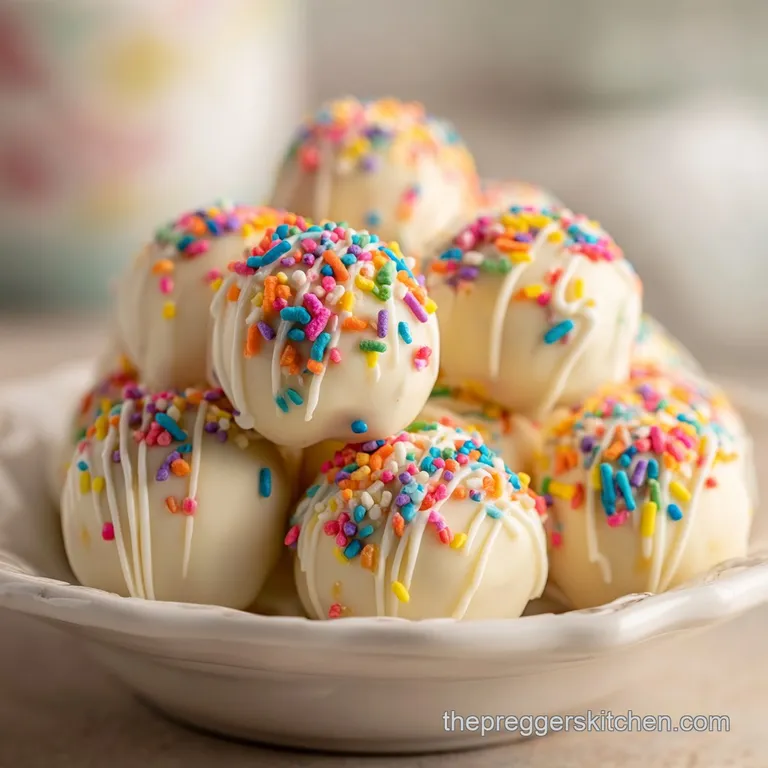
Sugar Cookie Truffles: Creamy and Buttery
- Time: Active 20 minutes, Passive 45 minutes, Total 65 minutes
- Flavor/Texture Hook: Buttery, vanilla forward center with a snappy white chocolate coating
- Perfect for: Holiday platters, party favors, or satisfying a late night sweet tooth
- Why Choosing The Right White Chocolate Changes Everything
- Why This Simple Flavor Layering Method Works
- Essential Decision Points For Every Home Baker
- Understanding The Role Of Each Component
- Selecting The Best Components For Flavor Layers
- Essential Kitchen Tools For Success Every Time
- The Seamless Process To Make Sugar Cookie Balls
- Troubleshooting Your Most Common Cookie Ball Mishaps
- Creative Ways To Change The Classic Recipe
- How To Keep Your Cookie Bites Fresh
- Beautiful Ways To Serve And Pair These
- Debunking Cookie Ball Misconceptions
- Recipe FAQs
- 📝 Recipe Card
Why Choosing The Right White Chocolate Changes Everything
The first time I attempted these, I used standard white chocolate chips from the baking aisle, thinking they were all the same. I was so wrong. The kitchen smelled like a dream, but the coating was thick, gluggy, and refused to smooth out.
I learned that day that white chocolate isn't technically "chocolate" in the traditional sense, but a delicate balance of cocoa butter and milk solids. If you want that professional, glass like finish, the quality of your coating is the hero of the story.
I've since moved on to high-quality melting wafers for my Sugar Cookie Truffles. They contain a higher ratio of fats that allow them to flow like silk over the chilled dough balls. When you bite into one, that shell should shatter against the softness of the cookie center.
It’s that specific contrast the resistance of the shell followed by the immediate give of the buttery interior that makes these so addictive. If you use a lower quality coating, you lose that "snap," and the whole experience feels heavy instead of elegant.
This dish is a masterclass in textures. We’re taking a humble, crunchy sugar cookie and transforming it into something that feels like it belongs in a boutique candy shop. It’s all about building layers of flavor: the buttery base, the tangy cream cheese, the warmth of pure vanilla, and finally, the sweet, creamy envelope of white chocolate.
Trust me, once you see how the nonpareils catch the light on that pristine white surface, you’ll never look at a plain sugar cookie the same way again.
Why This Simple Flavor Layering Method Works
Understanding how these ingredients interact is the difference between a soggy mess and a professional treat. It’s not just about mixing things together; it’s about managing moisture and temperature to create the perfect bite.
- Surface Area Absorption: Pulverizing the cookies into a "fine sand" increases the surface area, allowing the cream cheese to coat every microscopic crumb for a uniform, fudge like texture.
- Thermal Setting: Freezing the centers for 15-20 minutes ensures that the warm chocolate sets instantly upon contact, preventing the dough from melting or deforming during the dipping process.
- Lipid Thinning: Adding coconut oil to the white chocolate lowers its viscosity, creating a thinner, more professional shell that shatters easily rather than being waxy.
- Acidic Balance: The natural tang of full fat cream cheese cuts through the high sugar content of the cookies and white chocolate, preventing the flavor from becoming cloyingly sweet.
Essential Decision Points For Every Home Baker
| Servings | Ingredient Adjustments | Pan Size | Cook Time |
|---|---|---|---|
| 12 People | 0.5 lb cookies, 4 oz cream cheese | Small tray | 45 minutes |
| 24 People | 1 lb cookies, 8 oz cream cheese | Standard sheet | 45 minutes |
| 48 People | 2 lb cookies, 16 oz cream cheese | Two sheets | 55 minutes |
When you are planning your prep, remember that the "cook time" here really refers to the essential chilling and setting phases. You can't rush the cold! If you are making a double batch for a big party, make sure you have enough freezer space to accommodate two parchment lined sheets simultaneously.
Overcrowding the balls while they chill can lead to flat sides, which ruins that beautiful spherical aesthetic we're going for.
Understanding The Role Of Each Component
| Ingredient | Science Role | Pro Secret |
|---|---|---|
| Sugar Cookies | Structural Base | Use "hard bake" store cookies for a drier crumb that absorbs more moisture. |
| Cream Cheese | Binding Emulsifier | Must be full fat; the water content in "light" versions will make the truffles mushy. |
| White Chocolate | Protective Shell | Use wafers with cocoa butter listed as the first or second ingredient for a better melt. |
| Coconut Oil | Viscosity Modifier | Refined coconut oil provides the thinning effect without adding a coconut flavor. |
Selecting the right sugar cookie is vital because the moisture content varies wildly between brands. If you use soft, "Lofthouse" style cookies, you may need less cream cheese. I personally prefer the crunchier, buttery variety because they provide a much richer flavor profile once they are rehydrated by the cream cheese. If you're looking for more ways to satisfy a sweet tooth with a different texture, you might love my Healthy Oatmeal Cookies which offer a more rustic, chewy bite.
Selecting The Best Components For Flavor Layers
- 1 lb prepared sugar cookies: These are the heart of the recipe. Why this? Provides the buttery foundation and consistent sweetness needed for the truffle base.
- Substitute: Vanilla wafers or shortbread cookies.
- 8 oz full fat cream cheese, softened: This acts as our glue and flavor balancer. Why this? The fat content ensures a velvety mouthfeel that low-fat versions simply can't replicate.
- Substitute: Mascarpone for a richer, more Italian inspired flavor.
- 1 tsp pure vanilla extract: A small but mighty flavor booster. Why this? It bridges the gap between the cookie crumbs and the white chocolate coating.
- Substitute: Almond extract for a wedding cake flavor profile.
- 12 oz white chocolate melting wafers: The structural armor of the truffle. Why this? Formulated to melt smoothly and set firmly without the need for tempering.
- Substitute: high-quality white chocolate bars, finely chopped.
- 2 tsp coconut oil: The secret to a perfect dip. Why this? It thins the chocolate just enough to create a professional looking, thin coating.
- Substitute: Vegetable shortening or cocoa butter.
- 3 tbsp festive nonpareils or sprinkles: For visual appeal and a tiny bit of crunch. Why this? They add a pop of color and signal the flavor profile to your guests.
- Substitute: Crushed freeze dried strawberries or a drizzle of dark chocolate.
Essential Kitchen Tools For Success Every Time
To get that perfectly smooth, sand like consistency for your crumbs, a food processor is non negotiable. I use a 7 cup KitchenAid, but any standard model will do. If you try to crush the cookies by hand in a bag, you'll inevitably end up with larger chunks that create a "lumpy" truffle.
We want a homogeneous dough that feels like playdough, and only a machine can get the crumbs fine enough for that.
A small cookie scoop is your best friend for portioning. I use a 1 tablespoon scoop to ensure every single one of the 24 servings is identical. This isn't just about being a perfectionist; it’s about the chocolate to filling ratio.
If the balls are too big, they become difficult to dip and the flavor of the white chocolate gets lost. For the dipping phase, a specialized chocolate dipping fork is great, but a standard dinner fork works just as well if you know the "tap tap" trick to remove the excess.
The Seamless Process To Make Sugar Cookie Balls
- Process the cookies. Place 1 lb prepared sugar cookies into a food processor and pulse until they reach the consistency of fine, dry sand. Note: Don't stop until there are no visible chunks left.
- Cream the base. In a large bowl, beat the 8 oz softened cream cheese until smooth and aerated. Note: Using a hand mixer prevents lumps in the final dough.
- Combine the dough. Gradually fold in the cookie crumbs and 1 tsp vanilla extract until a stiff, uniform dough forms. You'll see the mixture pull away from the sides of the bowl.
- Portion and roll. Scoop 1 tablespoon mounds and roll them between your palms to create smooth, crack free spheres.
- The first chill. Place the spheres on a parchment lined baking sheet and chill in the freezer for 15-20 minutes. Wait until they are firm to the touch.
- Prep the coating. Melt 12 oz white chocolate with 2 tsp coconut oil in the microwave in 30 second bursts, stirring until fluid and smooth.
- The dipping dance. Dip one chilled cookie ball into the melted chocolate using a fork. Lift it out and tap the fork against the bowl to remove excess.
- The final touch. Immediately place the truffle back on the parchment and top with 3 tbsp festive nonpareils before the coating sets. The chocolate will dull slightly as it hardens.
Troubleshooting Your Most Common Cookie Ball Mishaps
Why Your Coating Is Falling Off
If the white chocolate is sliding right off the ball, it’s usually because the centers are too cold or have developed a layer of condensation. When moisture gets between the dough and the chocolate, they won't bond.
If you see "sweat" on your cookie balls after taking them out of the freezer, pat them gently with a paper towel before dipping.
Seized or Clumpy Chocolate
White chocolate is notoriously finicky. If a single drop of water gets into your melting bowl, or if you overheat it, it will "seize," turning into a gritty, thick paste. If this happens, you can sometimes save it by stirring in a teaspoon of vegetable oil, but it’s better to start fresh with a dry bowl and lower heat.
| Problem | Root Cause | Solution |
|---|---|---|
| Lumpy Dough | Cream cheese was too cold | Microwave cream cheese for 10 seconds and re mix. |
| Cracking Shells | Centers expanded after dipping | Let chilled balls sit at room temp for 2 mins before dipping. |
| Flat Bottoms | Chocolate was too thin | Reduce coconut oil or let chocolate cool slightly. |
Common Mistakes Checklist
- ✓ Ensure the cream cheese is truly at room temperature before mixing to avoid "white spots" in the dough.
- ✓ Use a food processor for the cookies; hand crushing creates a grainy, uneven texture.
- ✓ Don't skip the freezer step if the dough is warm, it will fall apart in the warm chocolate.
- ✓ Tap the fork repeatedly after dipping to ensure a thin, professional shell.
- ✓ Apply sprinkles immediately; white chocolate sets much faster than dark chocolate.
Creative Ways To Change The Classic Recipe
Once you've mastered the basic Sugar Cookie Truffles, the world is your oyster. You can easily swap the vanilla extract for almond or even peppermint for a holiday vibe. If you're feeling adventurous, try using lemon shortbread cookies instead of sugar cookies the citrusy zing paired with the white chocolate is incredibly refreshing.
For a fun twist that reminds me of my Frozen Yogurt Berry Bark, you can fold in a tablespoon of crushed freeze dried raspberries into the dough. This adds a beautiful pink fleck and a tart contrast to the sweet cookies. If you need to make these dairy-free, you can find vegan cream cheese and dairy-free white chocolate chips, though the texture of the shell will be slightly softer and less "snappy."
How To Keep Your Cookie Bites Fresh
Because these contain cream cheese, they cannot be left out on the counter for more than a couple of hours. Store them in an airtight container in the refrigerator for up to 5 days. I actually think they taste better on day two, once the flavors have had a chance to fully meld together.
For long term storage, these freeze beautifully. Place the set truffles in a single layer in a freezer safe bag or container. They will stay fresh for up to 2 months. When you're ready to eat them, let them thaw in the fridge for a few hours.
Zero Waste Tip: If you have leftover cookie crumbs that didn't make it into the dough, don't toss them! Keep them in a jar in the freezer to use as a topping for yogurt or ice cream.
Even the leftover melted chocolate can be spread thin on parchment, topped with nuts, and broken into "bark" once it hardens.
Beautiful Ways To Serve And Pair These
When I’m putting together a dessert board, I love to pair these truffles with something slightly bitter or salty to balance the sweetness. A dark roast coffee or a strong espresso is the ultimate companion the heat of the coffee melts the truffle in your mouth, creating a creamy latte like experience right on your tongue.
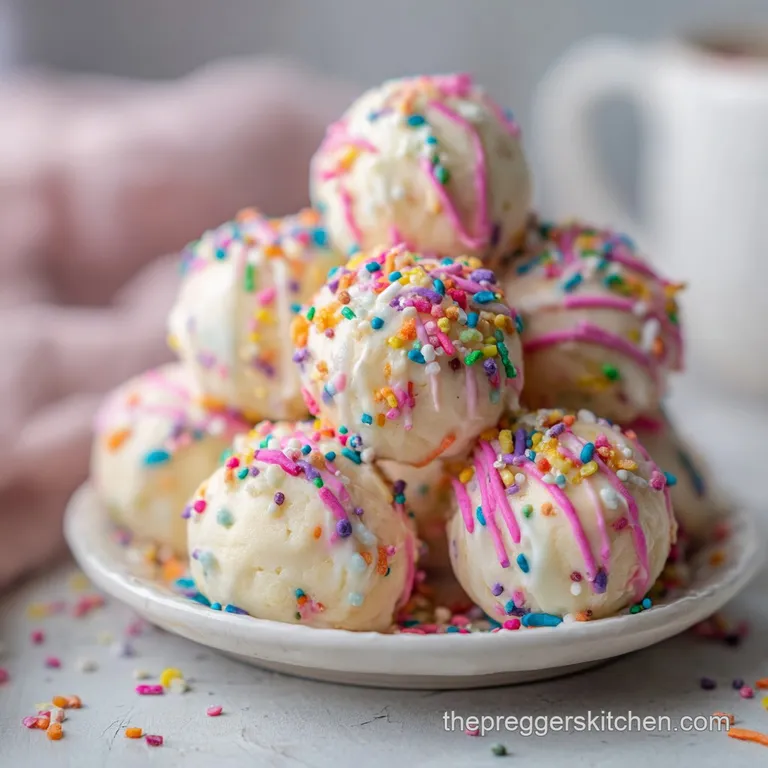
Visually, I like to use different colored sprinkles to denote different batches, or even a light dusting of edible gold glitter for a fancy touch. If you’re serving these at a party, place them in mini metallic cupcake liners. It keeps them from rolling around and makes them look like expensive truffles from a high end chocolatier. For another easy snack that pairs well with sweet treats, my Gestational Diabetes Apple Snack provides a nice crisp, fresh contrast to the rich truffles.
Debunking Cookie Ball Misconceptions
One major myth is that you can't use homemade cookies for this recipe. You absolutely can! In fact, if you have a batch of sugar cookies that turned out a bit too hard or crunchy, they are actually better for truffles than soft ones.
The drier the cookie, the more cream cheese it can absorb without becoming a greasy mess.
Another common belief is that you need a double boiler to melt the chocolate. While a double boiler is great for control, a microwave is perfectly fine if you are patient. The key is the "30 second burst" rule. If you try to melt it all at once, the bottom will burn before the top even softens.
Patience is the most important ingredient in any chocolate based dessert!
Finally, many people think you need to temper white chocolate to get a shine. Because we are using melting wafers (which contain specific fats like palm or coconut oil), tempering isn't necessary. These wafers are designed to mimic the look of tempered chocolate without the complex temperature tracking process.
It’s a shortcut that actually works, giving you that beautiful "shatter" with half the effort.

Recipe FAQs
Is it true I must use a double boiler to melt the chocolate?
No, this is a common misconception. A microwave works perfectly when you melt the white chocolate and coconut oil in 30-second bursts, stirring until fluid and smooth.
How to achieve the correct cookie crumb texture?
Pulse the cookies in a food processor until they reach the consistency of fine, dry sand. Ensuring there are no large chunks is key to forming a stable dough that rolls easily into spheres.
How to keep the truffles from falling apart while dipping?
Chill the rolled spheres in the freezer for 15-20 minutes before coating. This firming stage ensures the cream cheese mixture holds its shape when submerged in the warmer chocolate.
Can I use low-fat cream cheese for this recipe?
No, stick with full fat cream cheese. The higher fat content is essential for creating the smooth, aerated texture that binds the crumbs into a stiff, rollable dough.
How to ensure the chocolate coating is smooth?
Whisk the coconut oil thoroughly into the melted chocolate. If you enjoyed mastering this tempering technique, you will find it creates a professional, glossy finish on any chocolate dipped treat.
How to prevent the sprinkles from sliding off?
Apply the nonpareils immediately after dipping, while the chocolate is still wet. Once the chocolate sets, the coating becomes too firm for the sprinkles to adhere properly.
How to store sugar cookie truffles?
Keep them in an airtight container inside the refrigerator. Because they contain cream cheese, they must remain chilled to stay fresh and safe to eat.
Easy Sugar Cookie Truffles
Ingredients:
Instructions:
Nutrition Facts:
| Calories | 211 kcal |
|---|---|
| Protein | 2.4 g |
| Fat | 12.1 g |
| Carbs | 23.5 g |
| Fiber | 0.2 g |
| Sugar | 16.4 g |
| Sodium | 95 mg |
