Homemade Toffee: Buttery and Snappy
- Time: Active 10 minutes, Passive 5 minutes, Total 15 minutes
- Flavor/Texture Hook: A buttery, mahogany colored snap with a velvety chocolate finish and sharp sea salt.
- Perfect for: Holiday gifting, late night sugar cravings, or beginner candy makers.
- Creating the Ultimate Buttery and Salty Homemade Toffee
- How the Butter and Sugar Become One
- Essential Stats for Your Sweet Candy Cravings
- The Secrets Behind Every Single Ingredient
- The Right Tools for a Shatter Finish
- Step by Step to a Mahogany Toffee
- Fixes for Common Candy Making Hurdles
- Fun Flavor Spins and Easy Ingredient Swaps
- Keeping Your Toffee Crisp for Days
- What to Serve with These Salty Bites
- Recipe FAQs
- 📝 Recipe Card
Creating the Ultimate Buttery and Salty Homemade Toffee
Ever tried making candy only to watch in horror as a pool of yellow oil separates from a gritty, brown lump of sugar? It is one of those kitchen moments that makes you want to hang up the apron for good.
I remember my first attempt at a homemade toffee recipe; I followed a generic blog post, and within five minutes, my pan looked like a science experiment gone wrong. The butter had "broken," and no amount of frantic whisking could save that greasy mess.
It was a waste of expensive grass fed butter and, honestly, my afternoon mood.
But here is the thing: toffee is actually incredibly simple once you understand how to keep that butter and sugar locked in a tight embrace. The secret isn't some fancy equipment or a pastry degree; it is all about managing the emulsion from the second the heat hits the pan.
When you get it right, the smell that fills your kitchen is better than any candle you can buy a mix of toasted nuts, browned butter, and deep, dark sugar. It is the kind of aroma that brings people into the kitchen asking, "What are you making?" before the pan even hits the cooling rack.
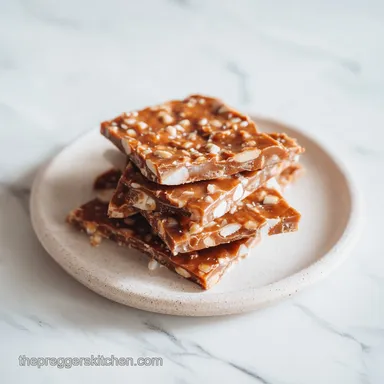
This version is my absolute favorite because it hits that perfect contrast between the hard, brittle snap of the candy and the smooth, melting layer of semi sweet chocolate on top.
We are adding a touch of water at the start to ensure the sugar dissolves completely before the fat starts to fry it, and we are finishing it with a heavy hand of flaky sea salt. Trust me, once you hear that first "shatter" of the toffee breaking into shards, you will never go back to the store-bought stuff again.
It is pure, buttery comfort in every bite.
How the Butter and Sugar Become One
The Emulsion Bridge: Adding a tablespoon of water allows the sugar to dissolve into a syrup before the butter fully melts, preventing the fat from separating and floating to the top.
The Hard Crack Snap: Cooking the mixture to exactly 300°F removes almost all moisture, ensuring the sugar molecules bond into a brittle, glass like structure that shatters when bitten.
Inversion Prevention: Constant stirring during the initial melt phase keeps the temperature uniform, which stops the sugar from forming large, gritty crystals on the side of the pan.
Residual Heat Melt: Using the heat from the hot toffee to melt the chocolate chips ensures the chocolate stays tempered and glossy rather than becoming chalky or dull.
| Method | Time | Texture | Best For |
|---|---|---|---|
| Stovetop Classic | 10 minutes | Glass like snap, deep nutty flavor | Gifting and traditional cravings |
| Microwave Fast | 6 minutes | Slightly grainier, lighter color | Instant sugar fixes |
| Small Batch | 8 minutes | Very thin and extra crispy | Topping for ice cream or lattes |
Getting that deep mahogany color without burning the mixture is the real goal here. If you pull it too early, you get "taffy" that sticks to your teeth; if you pull it too late, it tastes like charred carbon.
The sweet spot is that 300°F mark where the butter has browned just enough to develop a complex, toasted profile that balances out the intense sweetness of the granulated sugar.
Essential Stats for Your Sweet Candy Cravings
| Component | Science Role | Pro Secret |
|---|---|---|
| Salted Butter | Provides the fat for a tender bite and prevents the sugar from becoming too hard to chew. | Use high-quality butter with low water content for a more stable emulsion. |
| Granulated Sugar | The structural backbone that caramelizes to create the "hard crack" texture. | Never use brown sugar here; the moisture content is too unpredictable for this snap. |
| Water | Acts as a solvent to dissolve sugar crystals early in the process. | Just one tablespoon prevents the "grainy" texture most beginners struggle with. |
When you are looking for that perfect homemade toffee, you have to be precise with your ingredients. This isn't the place to eyeball things. We are working with 1 cup of salted butter (225g) and 1 cup of granulated white sugar (200g). This 1:1 ratio is the golden rule of traditional English toffee.
It ensures there is enough fat to make the candy rich and "velvety" on the tongue, but enough sugar to keep it structurally sound so it doesn't just melt in your hands.
For the topping, we are using 1.5 cups of semi sweet chocolate chips (250g). I find semi sweet provides the best contrast to the buttery base, but if you have a massive sweet tooth, milk chocolate works too. We finish with 0.5 cup of finely chopped roasted almonds (60g) for that essential crunch and a teaspoon of flaky sea salt to make all the flavors pop. If you find yourself wanting a more savory snack after this, you might love pairing a piece of toffee with a slice of my easy no knead artisan bread slathered in salted butter for a weird but wonderful afternoon treat.
The Secrets Behind Every Single Ingredient
- Salted Butter (1 cup): I always use salted because the salt is already incorporated, which helps round out the sweetness. Why this? Salted butter has a slightly lower smoke point, aiding in faster browning and flavor development.
- Substitute: Unsalted butter + 1/4 tsp fine salt.
- Granulated White Sugar (1 cup): This is non negotiable for the "snap." Why this? White sugar crystallizes more cleanly than brown sugar, providing a consistent brittle texture.
- Substitute: Organic cane sugar (may result in a slightly darker, more molasses like flavor).
- Water (1 tablespoon): The secret weapon for emulsion stability. Why this? It helps the sugar dissolve evenly before the butter reaches its boiling point.
- Substitute: None. Don't skip this!
- Pure Vanilla Extract (1 teaspoon): Adds a floral, warm back note to the toasted sugar. Why this? Adding it at the end preserves the delicate aromatic compounds that heat would destroy.
- Substitute: Vanilla bean paste for those beautiful little black specks.
- Semi Sweet Chocolate Chips (1.5 cups): Provides a rich, dark canopy for the toffee. Why this? Chips contain stabilizers that help the chocolate layer hold its shape better than bar chocolate.
- Substitute: Dark chocolate chunks for a less sweet, more "adult" flavor profile.
- Roasted Almonds (0.5 cup): For that classic crunch. Why this? Roasting the nuts first releases oils that complement the browned butter in the toffee.
- Substitute: Toasted pecans or chopped walnuts.
- Flaky Sea Salt (1 teaspoon): The final touch for flavor balance. Why this? The large flakes provide a burst of saltiness that cuts through the rich fat.
- Substitute: Kosher salt (use slightly less as it is denser).
The Right Tools for a Shatter Finish

You don't need a lab full of equipment to make an easy homemade toffee, but there is one thing you absolutely cannot skip: a heavy bottomed saucepan. If you use a thin, cheap pan, the heat will be uneven, and you will end up with "hot spots" where the sugar burns while the rest of the mixture is still cold.
I prefer a stainless steel or cast iron pot that can hold a steady temperature. A digital candy thermometer is also your best friend here. While some old school cooks can tell the stage by the color or by dropping bits into cold water, why guess when you can be certain?
You will also need a silicone spatula. Wooden spoons are classic, but sugar can stick to the grain of the wood, and silicone is much easier to clean when dealing with 300°F molten sugar.
Make sure your baking sheet is ready and lined with parchment paper or a silicone mat (like a Silpat) before you even turn on the stove. Once that toffee hits the hard crack stage, things move fast, and you do not want to be fumbling for paper while your candy is overcooking in the pan.
step-by-step to a Mahogany Toffee
- Prepare the Landing Zone. Line a 9x9 inch baking sheet with parchment paper or a silicone mat. Note: This ensures you can lift the entire block out once it is set.
- Combine the Base. In your heavy bottomed saucepan, add the salted butter, granulated sugar, and water. Note: Using medium heat is crucial; don't rush the melt.
- Create the Emulsion. Stir constantly as the butter melts. Until the mixture looks like a thick, pale yellow liquid with no oil streaks.
- Monitor the Temperature. Clip on your digital candy thermometer. Increase the heat slightly to medium high. Note: Stop stirring frequently now to allow the temperature to rise steadily.
- Reaching Hard Crack. Cook until the thermometer reads exactly 300°F (149°C). The mixture will be the color of an old penny and smell like toasted nuts.
- Add the Vanilla. Immediately remove the pan from the heat and whisk in the vanilla extract. Note: It will bubble and hiss aggressively; this is normal.
- The Pour. Pour the hot mixture onto your prepared baking sheet. Until it naturally spreads into an even, shimmering layer.
- The Chocolate Layer. Wait 30 seconds, then sprinkle the chocolate chips over the hot surface. Until they look shiny and soft (about 2 minutes).
- Spread and Finish. Use a spatula to smooth the chocolate into a velvety layer. Top with chopped almonds and sea salt.
- The Long Wait. Allow the toffee to sit at room temperature for at least 1 hour. Until it is completely firm and cold to the touch.
Fixes for Common Candy Making Hurdles
Why Your Toffee Separated
This is the most common heartbreak in simple toffee recipes. It usually happens because the temperature changed too quickly or you weren't stirring enough during the initial melting phase. When the butter separates, it looks like the sugar is drowning in a pool of oil. Don't panic!
You can often save it by adding a tablespoon of boiling water and whisking like your life depends on it. The water helps re bind the fat and sugar molecules into a unified emulsion.
Why Your Toffee is Chewy
If your homemade chocolate toffee feels more like a Tootsie Roll than a brittle snap, you didn't cook it long enough. The "Hard Crack" stage happens between 300°F and 310°F. If you pull it at 280°F, there is still too much moisture left in the sugar. Next time, trust the thermometer! If it's already made and chewy, you can't really re melt it easily, but you can chop it up and use it as "homemade toffee bits" for cookies or over vanilla bean French crepes.
| Problem | Root Cause | Solution |
|---|---|---|
| Grainy Texture | Sugar crystals formed on the side of the pan and fell back in. | Use a wet pastry brush to wash down the sides of the pan during cooking. |
| Chocolate Peeling Off | The toffee was too cold when the chocolate was applied. | Apply chocolate within 30 seconds of pouring the toffee base. |
| Burnt Taste | The heat was too high or the thermometer was touching the bottom of the pan. | Keep the thermometer bulb suspended in the liquid, not touching the metal. |
Common Mistakes Checklist
- ✓ Always use a heavy bottomed pan to prevent scorching and hot spots.
- ✓ Don't double the recipe in a small pan; the depth changes the cook time and emulsion stability.
- ✓ Check your thermometer accuracy by testing it in boiling water (should be 212°F).
- ✓ Avoid making toffee on a very humid or rainy day; sugar absorbs moisture from the air and can become sticky.
- ✓ Pat your roasted almonds dry if they seem oily to ensure they stick to the chocolate.
Fun Flavor Spins and Easy Ingredient Swaps
If you want to move away from the old fashioned toffee recipe and try something a bit more modern, the possibilities are endless. I love a "Dark & Salty" version where I use 70% dark chocolate and double the sea salt. It’s much less sweet and pairs beautifully with a glass of red wine or a sharp espresso.
For those who want "homemade toffee bars" that feel a bit more festive, you can swap the almonds for crushed candy canes during the holidays or dried cranberries and white chocolate for a "bark" style treat.
| Strategy | Adjustment | Texture/Flavor Impact |
|---|---|---|
| Nut Free | Use toasted sunflower seeds or crushed pretzels. | Adds a salty, earthy crunch without the allergens. |
| dairy-free | Use a high-quality vegan butter stick (not tub margarine). | Slightly softer snap; flavor depends heavily on the brand of vegan butter. |
| Mocha Twist | Add 1 tsp of instant espresso powder to the chocolate. | Deepens the cocoa notes and cuts through the buttery sweetness. |
Chef's Tip: If you want those perfectly square pieces you see in gourmet shops, use a sharp knife to "score" the chocolate layer about 20 minutes into the cooling process. Don't cut all the way through; just make lines. Once it's fully cold, it will snap perfectly along those tracks.
Keeping Your Toffee Crisp for Days
Toffee is a champion of shelf life if you treat it right. Because we’ve cooked out almost all the moisture, it can stay fresh for up to 3 weeks. The biggest enemy here is humidity.
If you leave it out on a counter in a humid kitchen, the sugar will start to pull moisture from the air, and your beautiful snap will turn into a sticky, tacky mess. Always store your homemade toffee in an airtight container.
I like to put layers of parchment paper between the pieces to prevent the chocolate from scuffing.
If you find yourself with small broken shards at the bottom of the container, don't you dare throw them away! These are "homemade toffee bits," and they are pure gold. Toss them into your next batch of cookies, sprinkle them over a bowl of oatmeal, or stir them into a DIY latte.
You can even freeze toffee for up to 3 months. Just make sure it is double wrapped to prevent freezer burn. When you’re ready to eat it, let it come to room temperature while still inside the container so any condensation forms on the outside of the box, not on your candy.
What to Serve with These Salty Bites
This toffee is a star on its own, but it also plays incredibly well with others. If you’re putting together a dessert board, I love serving these shards alongside tart green apples. The acidity of the apple cuts right through the heavy butter and sugar, refreshing your palate for the next bite.
It’s also the ultimate companion for a cup of black coffee or a decaf chai. The heat from the drink slightly melts the chocolate while you eat, creating a truly comforting experience.
If you’re feeling extra indulgent, crush some toffee and fold it into softened vanilla bean ice cream. The contrast between the cold cream and the crunchy, salty toffee is enough to make anyone a regular candy maker. It also makes a fantastic garnish for more complex desserts.
Imagine a single shard of this mahogany toffee sticking out of a chocolate mousse or a butterscotch pudding. It adds a level of "pro" finishing that makes any homemade meal feel like a celebration.
The Stirring Myth
Many people believe you should never stir candy once it starts boiling because it causes crystallization. While this is true for some clear syrups, for a fat heavy emulsion like toffee, you actually need a bit of gentle movement. If you don't stir at all, the butter can separate or the bottom can scorch.
The trick is to stir gently and avoid splashing the sides of the pan.
The "Searing" Misconception
Some think you need to "sear" the butter and sugar at high heat to get the color. High heat actually risks breaking the emulsion before the sugar has a chance to stabilize. A steady, medium high heat is much better for developing that deep mahogany color safely.
It's a slow and steady race that results in a much more complex flavor profile than a flash cooked syrup.

Recipe FAQs
What is the difference between toffee and English toffee?
English toffee typically contains butter, sugar, and almonds, whereas generic toffee may exclude nuts. Both are cooked to the hard crack stage, but the inclusion of roasted almonds and a chocolate coating is what defines the English variety.
Are toffee and caramel the same?
No, they have different final temperatures. Toffee is cooked to the hard crack stage (300°F) to become brittle, while caramel is cooked to a lower temperature, resulting in a soft or chewy texture.
What are the ingredients for toffee?
Use only salted butter, granulated white sugar, water, pure vanilla extract, semi sweet chocolate chips, roasted almonds, and flaky sea salt. These seven ingredients create the traditional flavor profile and structural stability required for the perfect snap.
Why is my toffee chewy and not crunchy?
You likely stopped cooking before the mixture reached 300°F. If you pull the saucepan off the heat at a lower temperature, the sugar remains in a soft ball or firm ball stage instead of the necessary hard crack stage for crispness.
How to prevent sugar crystallization during cooking?
Scrape down the sides of the saucepan constantly using a silicone spatula. This prevents stray sugar crystals from falling back into the mixture and causing a chain reaction of unwanted graininess. If you mastered this technique of controlling texture through temperature, you can apply similar precision to our dark cocoa marshmallow brownies to ensure a perfect crust.
Is it true I must stir the mixture constantly while it bubbles?
No, this is a common misconception. After the initial emulsion is formed and you clip on your thermometer, you should minimize stirring to avoid disrupting the heating process and the structural integrity of the cooling sugar.
How to achieve the perfect chocolate layer on top?
Wait exactly 30 seconds after pouring the hot toffee before adding the chips. Allowing the chips to sit for two minutes before spreading ensures they soften enough to create a smooth, even layer without cooling the base too quickly.
Homemade Toffee Recipe
Ingredients:
Instructions:
Nutrition Facts:
| Calories | 164 kcal |
|---|---|
| Protein | 1.0 g |
| Fat | 11.8 g |
| Carbs | 15.6 g |
| Fiber | 0.9 g |
| Sugar | 14.1 g |
| Sodium | 156 mg |
