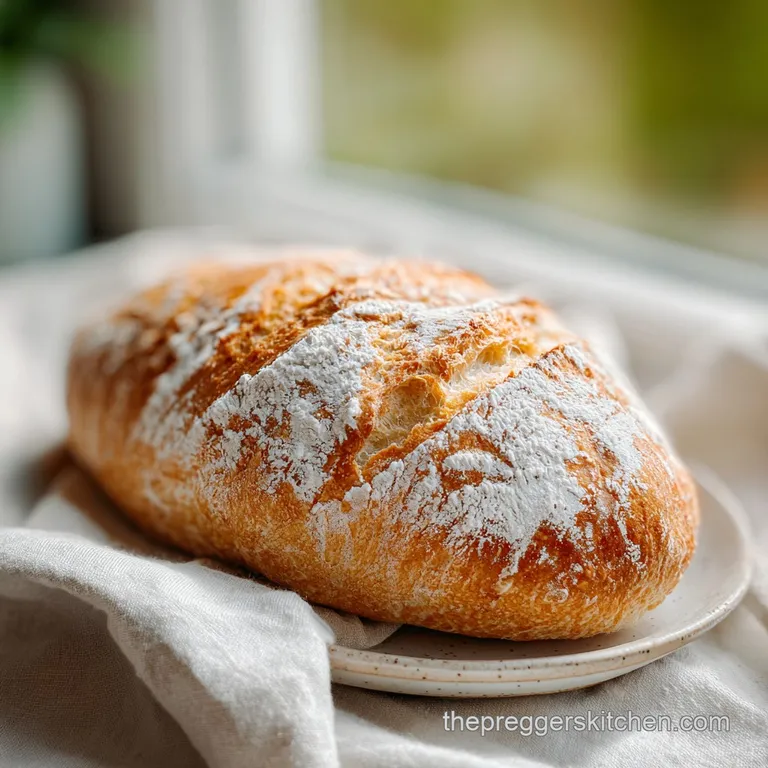
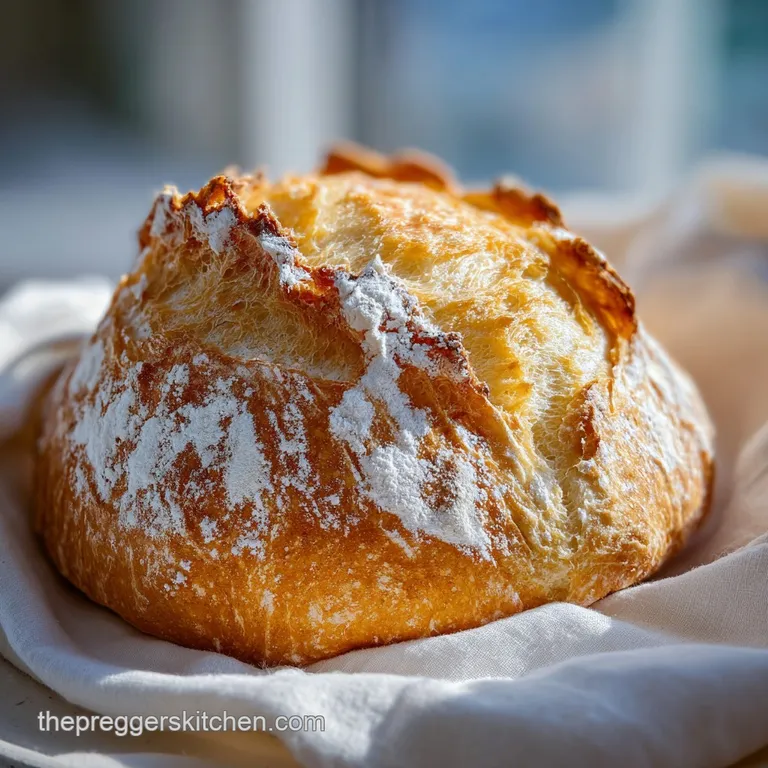
Bakery-Style Homemade French Bread
- Time: 20 min active + 2 hours 30 mins rising/baking = Total 2 hours 50 mins
- Flavor/Texture Hook: A crust that will shatter when you bite into it and a velvety, airy center
- Perfect for: Weekend brunch or as a side for a cozy family dinner
- The Secret to Great Homemade French Bread
- What Makes This Bread Rise
- The Bread Component Deep Dive
- What You'll Need
- Essential Gear for Your Loaf
- Step by Step Baking Guide
- Fixing Common Bread Problems
- Troubleshooting Common Issues
- Switching Up Your Loaf
- Adjusting Your Batch Size
- Debunking Bread Myths
- Keeping Your Bread Fresh
- The Best Ways to Serve
- Recipe FAQs
- 📝 Recipe Card
Listen, we've all been there. You spend hours kneading and waiting, only to pull a loaf out of the oven that looks like a balloon but feels like a rubber brick. I remember my first few tries where the crust was so hard I practically chipped a tooth, yet the inside was somehow still gummy.
It was frustrating, and I almost gave up on baking my own loaves.
But the trick isn't in some fancy equipment, it's all about the moisture. I realized that without steam in the oven, the crust sets too fast, trapping the bread and preventing it from actually growing. Once I started using a water skillet, everything changed.
Now, this homemade french bread is my go to because it actually works. You're going to get that nutty, toasted aroma filling your kitchen, and a loaf that feels professional. Let's get into it.
The Secret to Great Homemade French Bread
Right then, let's talk about why this version actually gives you that bakery result. Most people struggle with homemade french bread because they treat the oven like a dry box. In a professional bakery, they have steam injectors. We don't, but a hot skillet with water does the same thing.
The steam keeps the outside of the dough supple for a few extra minutes. This allows the bread to expand fully, which is called "oven spring." If the crust hardens too quickly, the bread stays dense. By adding that splash of water, you get a loaf that's light and airy inside with a skin that truly shatters.
But it's not just the steam. It's the patience during the rise. If you rush the dough, it won't have those beautiful, irregular holes. Trust me on this, give the yeast time to do its thing.
What Makes This Bread Rise
I've always been curious about why some loaves are like clouds and others are like rocks. After messing around with a few different methods, here is what I've found actually matters.
- Steam Power
- Water vapor prevents the crust from forming too early, allowing the loaf to grow taller.
- Gluten Structure
- Kneading creates a strong web of proteins that hold onto the gas bubbles produced by the yeast.
- Yeast Fuel
- A tiny bit of sugar gives the yeast an immediate energy source to start bubbling quickly.
- Temperature Control
- Warm water wakes the yeast up without killing it, ensuring a steady rise.
If you're wondering about how wet your dough should be, I've found that a slightly tacky feel is better than a dry, stiff ball. For those of you who want to dive deeper into dough hydration, check out this explanation from King Arthur Baking: [https://www.kingarthurbaking.com/blog/2021/08/16/with bread-is-wetter better-high hydration-dough]URL_0.
Before we get to the ingredients, take a look at how this compares to the shortcut versions you find at the store.
| Feature | This Homemade Loaf | store-bought "French" | Impact |
|---|---|---|---|
| Crust Texture | Shattering & Crisp | Leathery or Soft | Massive flavor difference |
| Interior | Velvety & Airy | Dense & Uniform | Better mouthfeel |
| Ingredients | 6 Simple Items | Preservatives & Dough Conditioners | Healthier, cleaner taste |
| Effort | 2h 50m | 5 Minutes | More work, but way more reward |
It's a bit more effort, sure, but that first bite of warm, salty crust makes it worth every minute.
The Bread Component Deep Dive
I don't think of these as just "ingredients," but as tools that each do a specific job. If you change one, you change the whole vibe of the bread.
| Ingredient | Science Role | Pro Secret |
|---|---|---|
| All Purpose Flour | Provides the structure | Measure by weight (375g) for consistency |
| Active Dry Yeast | The lifting agent | Always check for foam before adding flour |
| Sea Salt | Controls yeast & adds flavor | Don't let it touch the yeast directly at first |
| Warm Water | Hydrates the flour | Keep it around 105-115°F (40-45°C) |
What You'll Need
Gather these up before you start. There's nothing worse than being halfway through kneading and realizing you're out of salt.
- 3 cups (375g) all purpose flour Why this? Balanced protein for a tender but sturdy crumb
- 2 ¼ tsp (7g) active dry yeast Why this? Reliable lift and classic bakery scent
- 1 tsp (6g) granulated sugar Why this? Feeds the yeast to speed up the bloom
- 1 ½ tsp (9g) fine sea salt Why this? Enhances the nutty grain flavor
- 1 cup (240ml) warm water Why this? Activates yeast without scalding it
- 1 tbsp (15g) unsalted butter, melted and cooled Why this? Adds a velvety interior and subtle richness
If you don't have butter, a tablespoon of neutral oil works too. It won't have that same buttery richness, but the texture will still be great.
Essential Gear for Your Loaf
You don't need a professional kitchen, but a few specific tools make this way easier.
- Large mixing bowl: For the first rise.
- Cast iron skillet or metal baking pan: This goes on the bottom rack to create the steam.
- Baking sheet: To hold your loaf.
- Damp kitchen towel: To keep the dough from drying out while it rises.
- Sharp knife or razor: For scoring the top. If you're serious about those bakery slashes, Bon Appetit has a great guide on this little tool that takes the stress out of scoring.
Step by step Baking Guide
Let's crack on. Remember to follow the sensory cues - the smell and feel are more important than the timer.
- Bloom the yeast. Combine warm water, sugar, and yeast in your bowl. Let it sit for 5-10 minutes until it looks foamy and smells like a brewery. Note: If it doesn't foam, your yeast is dead; start over with fresh yeast.
- Mix the base. Stir in the melted butter and salt. Gradually add the flour, stirring with a wooden spoon until a shaggy dough forms.
- Knead the dough. Turn it onto a floured surface. Knead for 5-7 minutes until the dough is smooth, elastic, and bounces back immediately when poked. Note: This is where the gluten develops!
- The first rise. Place the dough in a greased bowl and cover with a damp towel. Leave it in a warm spot for 60-90 minutes until it has doubled in size.
- Shape the loaf. Gently punch the dough down to release gas. Roll it into a rectangle, then fold it into a tight cylinder, pinching the seam shut.
- Prep the oven. Preheat your oven to 425°F (218°C). Place an empty skillet on the bottom rack.
- Score the top. Place the loaf on a baking sheet. Use a sharp knife to make three diagonal slashes across the top.
- Bake with steam. Put the loaf in the oven. Carefully pour 1 cup of hot water into the skillet - you'll hear a loud sizzle - and close the door immediately. Bake for 25-30 minutes until the crust is deep golden brown and sounds hollow when tapped.
Chef's Note: To get an even more velvety crumb, try letting the dough rise in the fridge overnight. This "cold ferment" creates a deeper, more complex flavor that tastes like it came from a French village.
Fixing Common Bread Problems
Even for us obsessed cooks, things go sideways. Most bread issues come down to yeast or temperature.
Troubleshooting Common Issues
| Issue | Solution |
|---|---|
| Why Your Homemade French Bread is Dense | This usually happens if the dough didn't rise enough or if you over handled it after the first rise. If it feels like a brick, you might have under proofed it or used old yeast. |
| Why the Crust is Too Hard | If the crust is like a rock, you probably didn't get enough steam in the oven. The water in the skillet should be boiling or very hot when it hits the pan. |
| Why the Loaf Didn't Rise | This is almost always a yeast issue. Either the water was too hot (killing the yeast) or too cold (not waking it up). |
- ✓ Use a kitchen scale for the flour to avoid packing it too tightly.
- ✓ Always use the "poke test" to see if the dough is ready.
- ✓ Don't skip the steam - it's the most important part.
- ✓ Let the bread cool for at least 30 mins before slicing.
Switching Up Your Loaf
Once you've nailed the basic homemade french bread, you can start playing with flavors. I love adding things that make it feel a bit more indulgent.
- Garlic & Herb
- Brush the crust with melted butter, minced garlic, and parsley right after it comes out of the oven.
- Whole Grain
- Swap 1 cup of all purpose flour for whole wheat flour. Note: It will be denser and need a bit more water.
- Honey Twist
- Use honey instead of sugar in the yeast bloom for a slightly sweeter, more floral aroma.
If you want a meal to go with this, a Grilled Caprese Sandwich is a killer combo. The crispness of the bread matches the melted mozzarella perfectly.
| Original Ingredient | Substitute | Why It Works |
|---|---|---|
| AP Flour (375g) | Bread Flour (375g) | Higher protein. Note: Gives a chewier, more professional texture |
| Butter (1 tbsp) | Olive Oil (1 tbsp) | Similar fat content. Note: Adds a slight Mediterranean flavor |
| Sugar (1 tsp) | Maple Syrup (1 tsp) | Similar sweetness. Note: Adds a hint of autumnal richness |
Adjusting Your Batch Size
You might not always want a full loaf of homemade french bread. Here is how to scale it.
Cutting it in half: Use 1.5 cups of flour, 1 ⅛ tsp yeast, ½ tsp sugar, ¾ tsp salt, ½ cup water, and ½ tbsp butter. Use a smaller baking sheet and reduce bake time by about 5-7 minutes.
Doubling the recipe: Use 6 cups of flour and double everything else, but be careful with the salt - I usually only go to 2.5 tsp instead of 3 to keep it from being too salty. Work in two separate loaves rather than one giant one, as the center of a double loaf often stays gummy.
Debunking Bread Myths
There are a lot of "rules" out there that just aren't true. Let's clear some up.
Myth: You need a Dutch oven for crusty bread. While they're great, the water skillet method is just as effective and way cheaper. You still get that shatter crisp crust without the heavy pot.
Myth: More kneading always means better bread. Actually, over kneading can make the bread tough and rubbery. Stop once the dough is smooth and passes the poke test.
Keeping Your Bread Fresh
Homemade french bread doesn't have the preservatives of store-bought loaves, so it stales faster.
Storage: Keep it in a paper bag at room temperature for about 2 days. Avoid plastic bags, as they trap moisture and make the crust soft and leathery.
Freezing: Slice the loaf first, then freeze the slices in a freezer bag for up to 3 months. You can pop a slice directly into the toaster for that fresh baked feel.
Zero Waste: When the bread gets too hard for sandwiches, don't toss it! Cube it, toss it with olive oil and salt, and bake at 350°F for 15 minutes for the best croutons of your life. Or, turn it into a savory bread pudding.
The Best Ways to Serve
This bread is a superstar on its own, but it's even better with a few additions. I love serving it warm with a bowl of salted butter or a dip of olive oil and balsamic vinegar.
For a real treat, slice it lengthwise, toast it with garlic butter, and use it for a homemade garlic bread. This bread is the only thing that matches the richness of my Chicken Pot Pie.
Whether you're using it to sop up pasta sauce or just eating a piece while it's still steaming from the oven, this homemade french bread is a total winner. Once you taste that shatter crisp crust and velvety center, you'll never go back to the supermarket aisles. Let me know how yours turns out!
Recipe FAQs
What is the best flour for French bread?
All-purpose flour is the best choice. It provides the ideal balance of structure and tenderness required for this specific recipe.
What makes French bread different than other bread?
Minimal ingredients and a steamed oven. This relies on a lean dough to create a characteristic crispy crust and airy interior. If you enjoyed working with a simple dough here, see how the same principle works in our artisan bread.
What are the 5 French breads called?
Baguette, Boule, Ficelle, Batard, and Épi. While this recipe makes a standard loaf, these variations differ primarily by their shape and size.
Is French bread high in fodmap?
Yes, it is high FODMAP. The wheat flour contains fructans, which can trigger symptoms for those with FODMAP sensitivities.
How to get a crispy crust?
Preheat your oven to 425°F with an empty skillet on the bottom rack. Pour 1 cup of hot water into the skillet immediately after placing the bread in the oven to create steam.
Is it true I must knead the dough for an hour to get the right texture?
No, this is a common misconception. Kneading for 5 7 minutes until the dough is smooth and elastic is sufficient for this recipe.
Why is my bread coming out dense?
Under proofing or dead yeast is usually the cause. Ensure your yeast foams during the bloom stage and the dough doubles in size during the 60 90 minute rise.
Homemade French Bread

