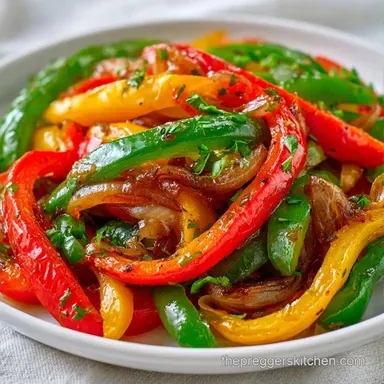
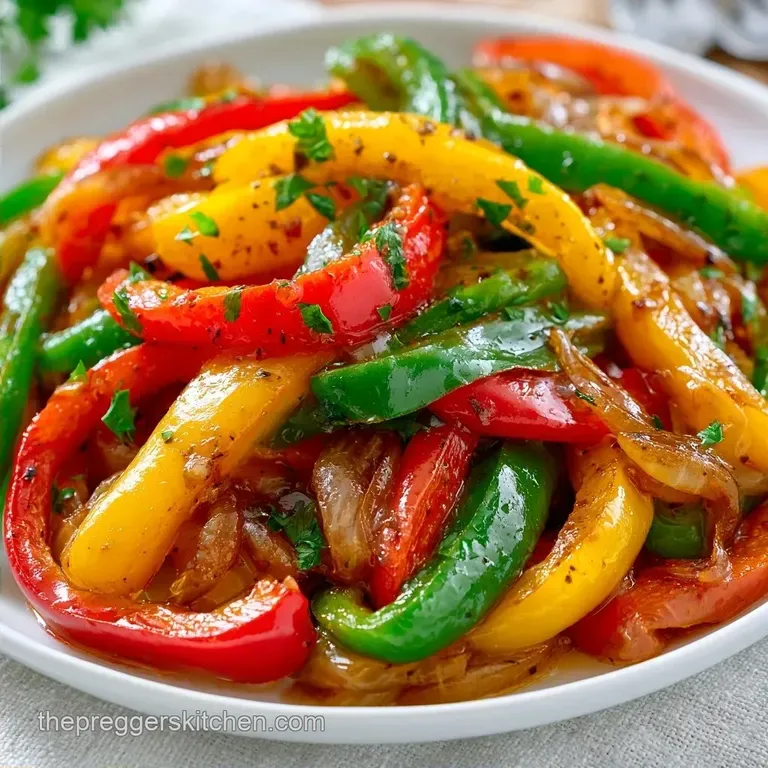
Sautéed Peppers and Onions: Charred and Tender
- Time: 5 min active + 15 min cook = Total 20 mins
- Flavor/Texture Hook: Charred edges with a velvety, tender crisp finish
- Perfect for: Weeknight sides, meal prep, or topping for grilled meats
- Sautéed Peppers and Onions
- Essential Component Analysis
- Gathering Your Essentials
- Necessary Kitchen Tools
- Detailed Cooking Steps
- Fixing Common Cooking Issues
- Troubleshooting Common Issues
- Creative Flavor Variations
- Precision Adjustment Guidelines
- Debunking Kitchen Myths
- Preservation Secrets
- Serving and Pairing Ideas
- Recipe FAQs
- 📝 Recipe Card
The scent of butter foaming in a hot pan, followed by that sharp, sweet hiss of onions hitting the heat, is one of the most comforting sounds in any kitchen. For me, this dish is a memory of family gatherings where a huge skillet of vegetables sat in the middle of the table, acting as the anchor for every other protein.
It's a simple tradition, but it's one that bridges the gap between a quick weeknight meal and a slow, celebratory feast.
When I first started cooking for my family, I struggled with the texture. My vegetables would either be mushy or raw in the middle. I realized that the secret isn't just the heat, but the patience to let the vegetables sear without moving them.
By giving them space to touch the hot metal, you get those mahogany edges that make the dish taste like it came from a professional grill.
Whether you're looking for a side that's iron rich to keep your energy up during a busy day or just something to add color to your plate, these Sautéed Peppers and Onions bring a balanced sweetness.
It's about maximizing the nutrients while keeping the effort low, which is exactly what we need when physical fatigue kicks in.
Sautéed Peppers and Onions
Right then, let's talk about why this works. Most people just toss everything in a pan and stir constantly, but that actually steams the vegetables instead of searing them. To get that specific "restaurant" look, you need to manage the moisture and the temperature of your fats.
The Fat Blend: Using both olive oil and butter ensures the pan can get hot enough to sear without the butter burning, while still providing a velvety mouthfeel.
Searing Window: Letting the peppers sit undisturbed for a few minutes allows the sugars to concentrate on the surface, creating a charred, smoky flavor.
Aromatic Timing: Adding garlic at the very end prevents it from turning bitter, as it only needs about 60 to 90 seconds to release its fragrance.
Uniformity: Cutting everything to 6mm ensures every piece cooks at the same rate, so you don't end up with some bits burnt and others raw.
According to Serious Eats, maintaining a consistent pan temperature is the key to avoiding the "stewing" effect that happens when too many cold vegetables crowd a pan.
| Method | Time | Texture | Best For |
|---|---|---|---|
| over High heat Sear | 15 mins | Charred & Crisp | Fajitas or Steak |
| Low Slow Sauté | 30 mins | Soft & Jammy | Sandwiches |
| oven roasted | 25 mins | Concentrated | Meal Prep |
Essential Component Analysis
Understanding your ingredients helps you make better choices on the fly. For those focusing on maternal wellness, the bell peppers are particularly valuable because they are folate packed, supporting overall cellular health and energy.
| Ingredient | Science Role | Pro Secret |
|---|---|---|
| Bell Peppers | Structure & Sweetness | Use mixed colors for a wider range of antioxidants |
| Yellow Onion | Base Flavor (Sulfur) | Slice poles to pole for better shape retention |
| Unsalted Butter | Flavor & Browning | Brown it slightly first for a nuttier aroma |
| Garlic | Pungent Finish | Mince finely to distribute flavor evenly |
Gathering Your Essentials
I've found that having everything prepped before the heat is on saves so much stress. Trust me on this, once the butter starts foaming, you won't have time to chop a rogue garlic clove.
- 3 large bell peppers, assorted colors Why this? Provides a mix of vitamins and visual appeal (Substitute: Poblano peppers for a smoky heat)
- 1 large yellow onion Why this? Balanced sweetness and sharp bite (Substitute: Red onion for a bolder color)
- 3 cloves garlic, minced Why this? Essential aromatic depth (Substitute: 1 tsp garlic powder)
- 2 tbsp extra virgin olive oil Why this? High smoke point and healthy fats (Substitute: Avocado oil)
- 1 tbsp unsalted butter Why this? Adds a velvety finish and richness (Substitute: Vegan butter or coconut oil)
- 1/2 tsp kosher salt Why this? Draws out moisture and enhances flavor (Substitute: Sea salt)
- 1/4 tsp cracked black pepper Why this? Adds a subtle woody heat (Substitute: White pepper)
- 1/4 tsp dried oregano Why this? Earthy, herbal note (Substitute: Dried thyme)
Necessary Kitchen Tools
You don't need a fancy setup for this, but a few specific tools make the process smoother.
- Large Cast Iron or Stainless Steel Skillet: These hold heat much better than non stick, which is how you get that mahogany sear.
- Sharp Chef's Knife: Essential for getting those uniform 6mm strips.
- Metal Spatula: Perfect for scraping up the brown bits (the fond) from the bottom of the pan.
- Tongs: Helpful for flipping larger chunks of peppers quickly.
Detailed Cooking Steps
Let's crack on with the actual cooking. Remember, the goal is "tender crisp," not mush.
- Slice the produce. Cut the bell peppers and onion into uniform strips, approximately 6mm thick. Note: Uniformity prevents uneven cooking.
- Heat the base. Add olive oil and butter to the skillet over medium high heat. Wait until the butter foams and smells nutty.
- Sauté the onions. Add the onion strips and cook for 4–5 mins until the edges are translucent and pale golden.
- Add the peppers. Increase the heat slightly and spread the sliced bell peppers in an even layer.
- Create the sear. Let the peppers sit undisturbed for 2–3 mins until you see a mahogany colored crust forming on the bottom.
- Stir and soften. Stir occasionally for another 5-7 mins until the peppers are tender crisp and exhibit charred edges.
- Incorporate aromatics. Reduce the heat to medium. Stir in the minced garlic, salt, pepper, and dried oregano.
- Finish the dish. Sauté for 60 90 seconds until the garlic is fragrant, then remove from heat immediately to prevent burning.
Fixing Common Cooking Issues

One mistake I once made was overcrowding the pan. I tried to double the recipe in one small skillet, and instead of searing, the vegetables released all their water and boiled. It was a soggy mess.
Troubleshooting Common Issues
| Issue | Solution |
|---|---|
| Why Your Veggies Are Mushy | If your vegetables are soft and pale rather than charred, you've likely overcrowded the pan or stirred too often. |
| Why Your Garlic Is Bitter | Garlic has a very low burn point compared to onions. If you add it at the start, it will turn black and bitter long before the peppers are cooked. Always save it for the final 90 seconds. |
| Why Your Peppers Are Raw | This usually happens if the heat is too low or if you've added too much oil, which "fries" the outside but doesn't let the heat penetrate the center. Keep the heat at medium high. |
Common Mistakes Checklist
- ✓ Did you slice everything to 6mm?
- ✓ Did you wait for the butter to foam before adding onions?
- ✓ Did you leave the peppers undisturbed for 3 minutes?
- ✓ Did you remove the pan from the heat as soon as the garlic smelled fragrant?
- ✓ Did you avoid using a lid (which traps steam)?
Creative Flavor Variations
This Easy Sautéed Peppers and Onions recipe is a blank canvas. Depending on what you're serving it with, you can shift the flavor profile entirely.
For the Steak Lovers: If you're making Sautéed Peppers and Onions for Steak, try adding a splash of Worcestershire sauce or a knob of garlic butter at the very end. The acidity cuts through the richness of the beef.
Fajita Style: For Sautéed Peppers and Onions for Fajitas, swap the oregano for cumin and smoked paprika. Serve with warm tortillas and a squeeze of lime.
The Sausage Pairing: When making Sautéed Peppers and Onions for Sausage or Sautéed Peppers and Onions for Brats, add a tablespoon of apple cider vinegar during the final minute. It balances the heavy fats of the sausage.
Taco Toppings: For Sautéed Peppers and Onions for Tacos, add a pinch of chili powder and some chopped cilantro right before serving. This adds a fresh, zesty kick.
If you're looking for a high protein main to pair with these vegetables, my Lemon Herb Chicken is a fantastic option that keeps the meal light and nourished.
Precision Adjustment Guidelines
When you need to change the amount, you can't always just multiply everything. The physics of the pan changes as you add more volume.
Scaling Down (½ Batch): Use a smaller skillet (8 inch) to ensure the vegetables aren't swimming in oil. Reduce the total cook time by about 20% as the pan will heat up and cool down faster.
Scaling Up (2x-4x Batch): This is where most people fail. Do NOT double the vegetables in one pan. Work in batches. If you must use one giant pot, reduce the liquids by 10% and only increase the salt and oregano to 1.5x to avoid over seasoning.
Baking Alternative: If you prefer the oven, toss everything in oil and roast at 200°C (400°F) for 20 mins.
Lower the temperature by about 15°C if you're using a convection oven to prevent the edges from burning before the centers soften.
Debunking Kitchen Myths
There are a few things people tell you about sautéing that just aren't true.
Myth: You must "seal" the vegetables. Unlike meat, vegetables don't have juices to "seal in." The searing process is purely for flavor and texture. You're creating caramelized sugars, not trapping moisture.
Myth: Non stick pans are best for everything. While easy to clean, non stick pans often can't handle the high heat needed for a true mahogany sear without damaging the coating. Stainless steel or cast iron is superior for this specific recipe.
Myth: More oil equals crispier vegetables. Too much oil actually leads to deep frying or steaming. You only need enough to coat the bottom of the pan and lubricate the vegetables.
Preservation Secrets
Since these are folate packed and iron rich, you'll want to keep as many nutrients as possible.
Fridge Storage: Keep them in an airtight glass container for up to 4 days. They actually taste better the next day as the flavors meld.
Freezing: You can freeze this dish for up to 3 months. Note that the texture will soften slightly upon thawing, so they are better used in omelets or stews after freezing.
Zero Waste Tips: Don't throw away the pepper stems or onion skins! Collect them in a freezer bag and use them to make a vegetable stock. Also, if you have leftover Sautéed Peppers and Onions, they make a great base for a quick frittata.
Serving and Pairing Ideas
The versatility of this Peppers and Onions Recipe is what makes it a staple. Because it's a neutral but flavorful side, it fits almost any meal.
For a breakfast feast, these vegetables are a natural fit inside Mini Egg Frittatas, adding color and essential nutrients to start the day. The sweetness of the onions pairs beautifully with the richness of the eggs.
If you're serving this as a side for dinner, try plating it underneath a grilled protein. The juices from the meat will mingle with the butter and oregano, creating a natural sauce. For a vegan option, serve it over a bed of quinoa or brown rice with a dollop of hummus.
Honestly, don't even bother with low-fat substitutes here. The butter and olive oil are what carry the flavor of the oregano and garlic. Keep it simple, keep it honest, and enjoy the sizzle.
Recipe FAQs
What is the best way to saute onions and peppers?
Slice vegetables into uniform 1/4 inch strips. Sauté onions in butter and olive oil for 4-5 minutes, then sear peppers undisturbed for 2-3 minutes on higher heat.
Are peppers ok for diabetics?
Yes, bell peppers are an excellent choice. They are low-calorie and low-carb, making them suitable for most diabetic diets.
Is it better to saute bell peppers in butter or oil?
Use a combination of both. Olive oil raises the smoke point to prevent burning, while butter provides a rich, nutty flavor.
What's the secret to perfectly sauteed peppers?
Leave them undisturbed for 2-3 minutes. This allows the peppers to develop a mahogany colored sear and charred edges instead of steaming.
Why are my sautéed peppers mushy instead of charred?
You probably overcrowded the pan or stirred too frequently. Too many vegetables in the pan release excessive moisture, which steams the produce rather than searing it.
Why does my garlic taste bitter in this recipe?
The garlic was likely added too early. Garlic burns quickly and becomes bitter, so always stir it in during the final 60-90 seconds of cooking.
Can I substitute the butter with more olive oil?
Yes, you can use all olive oil. This makes the dish dairy-free, a preference we also accommodate in our black bean burger.
Sauteed Peppers And Onions